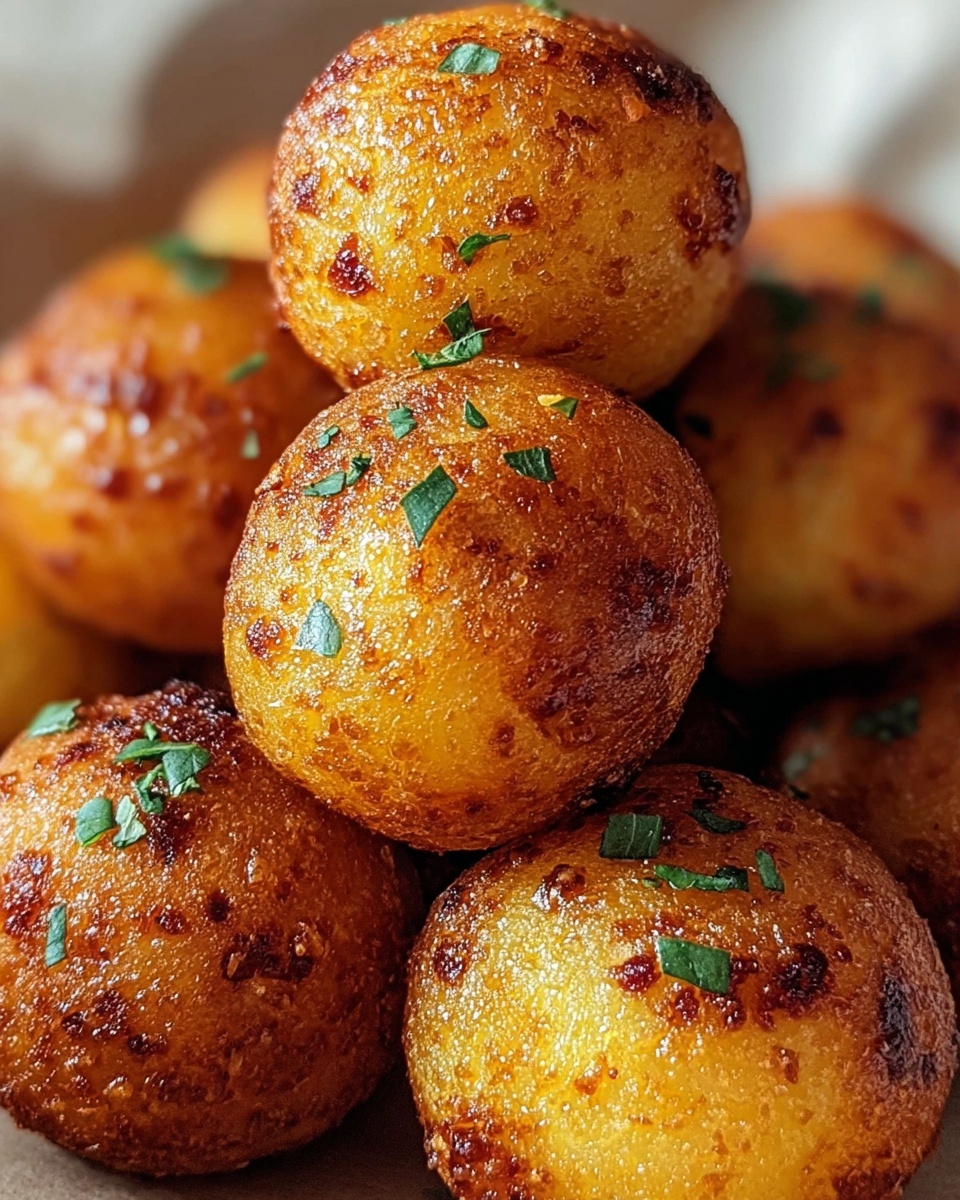
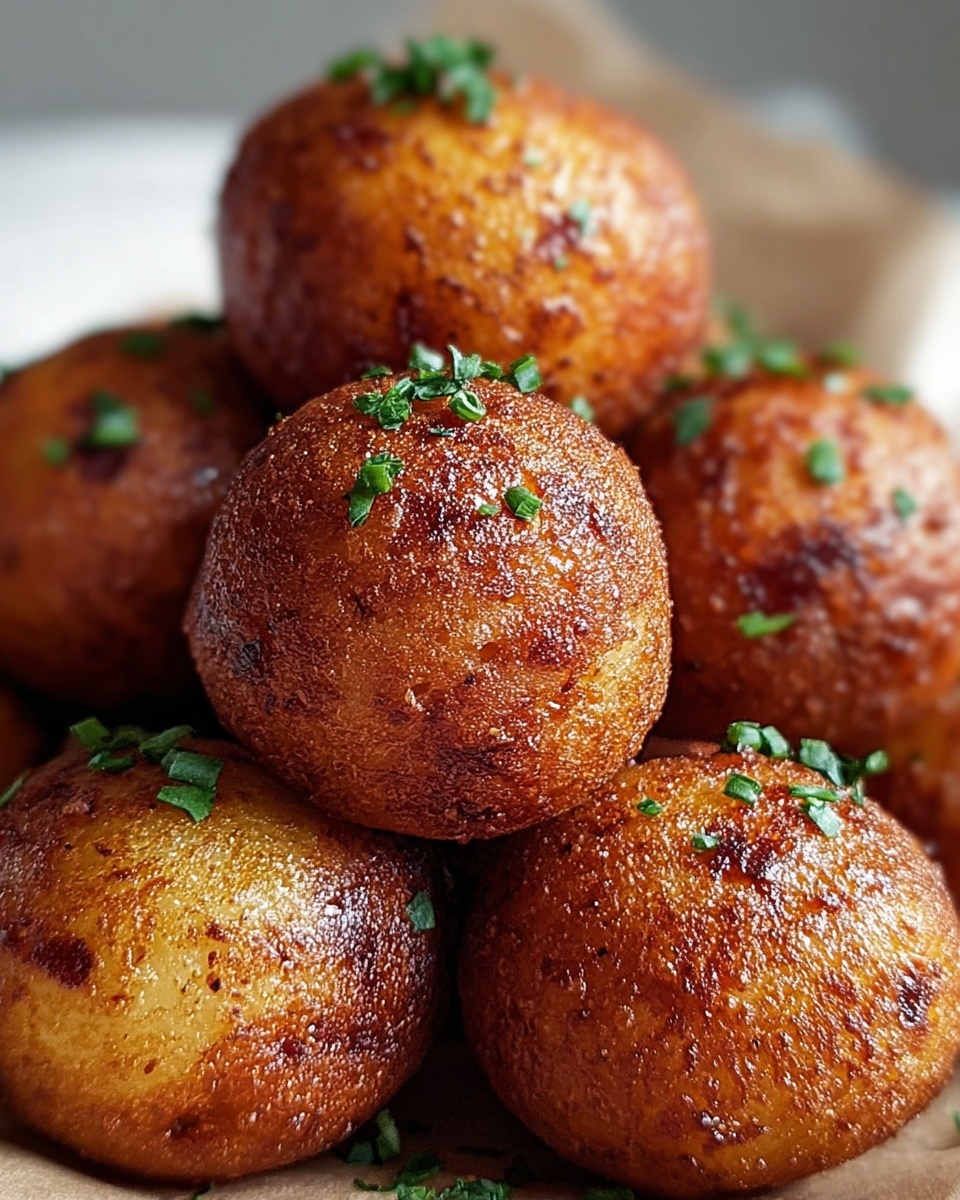
If you’re looking for a snack or side dish that’s bursting with flavor and incredibly satisfying, **Garlic Potato Balls: A Delicious and Easy Recipe to Try Today Recipe** is the perfect choice to add to your kitchen repertoire. These golden, crispy bites combine creamy potatoes with fragrant garlic, fresh parsley, and melty cheese, creating a harmony of textures and tastes that always impress. Whether you’re making them for a casual family gathering or whipping up a quick appetizer for friends, this recipe promises a delicious experience with every bite.
Ingredients You’ll Need
Gathering simple, fresh ingredients is the key to bringing these potato balls to life. Each component plays a vital role in building the perfect balance of creamy, cheesy, and garlicky goodness, while the spices add a subtle kick to keep things exciting.
- Potatoes: The base of our dish, they should be starchy for fluffiness and easy mashing.
- Cheese: Adds richness and gooeyness inside the balls, choose a melting cheese like mozzarella or cheddar.
- Parsley: Fresh parsley brightens the flavor and adds a pop of color.
- Garlic: The star ingredient — gives the balls their irresistible aroma and depth.
- Spices: A pinch of your favorite spices like pepper and paprika enhances the overall flavor.
- Bacon (optional): Adds a smoky crunch, turning these into a real crowd-pleaser.
- Oil (for frying): Use a neutral oil with a high smoke point for the perfect crispiness.
How to Make Garlic Potato Balls: A Delicious and Easy Recipe to Try Today Recipe
Step 1: Prepare the Potatoes
Begin by peeling and boiling the potatoes until they’re tender but not falling apart. Drain well and mash them while still warm — this will give you the perfect creamy base for the balls. Make sure there are no lumps for a smooth texture that forms easily.
Step 2: Mix in the Flavor
Add finely minced garlic, chopped parsley, shredded cheese, and your choice of spices directly into the mashed potatoes. If you decide to include bacon, crumble it finely and mix it in here as well. Stir everything until fully combined into a uniform mixture bursting with flavor.
Step 3: Shape the Potato Balls
Once your mixture is ready, dampen your hands slightly and begin forming small balls, roughly the size of a golf ball. This size is ideal for a bite-sized snack or appetizer, making each ball an explosion of taste in every mouthful.
Step 4: Fry Until Golden
Heat the oil in a deep pan or fryer to about 350°F (175°C). Carefully drop the potato balls in batches into the hot oil and fry them until they are golden brown and beautifully crispy on all sides. Remove them with a slotted spoon and place them on paper towels to soak up any excess oil.
Step 5: Repeat and Serve Warm
Continue frying until all the potato balls are cooked. Serve them warm for the best experience, garnished with a sprinkle of fresh chopped parsley to add a fresh, herbaceous note.
How to Serve Garlic Potato Balls: A Delicious and Easy Recipe to Try Today Recipe
Garnishes
A simple garnish can elevate your Garlic Potato Balls to gourmet status. Fresh parsley is a classic choice, but you can also try sprinkle of grated Parmesan for extra cheesiness or a drizzle of garlic aioli to complement the flavors beautifully.
Side Dishes
These potato balls make an excellent appetizer or side dish for almost any meal. Pair them with a fresh green salad, tangy coleslaw, or even alongside grilled meats for a comforting and balanced plate. They’re equally wonderful with a dipping sauce, such as spicy ketchup or creamy ranch.
Creative Ways to Present
For a fun twist, serve the garlic potato balls on skewers or arrange them in bite-sized portions with assorted dipping sauces. They’re also fantastic atop a bed of greens or as part of a tapas-style spread, inviting everyone to dig in and share the deliciousness.
Make Ahead and Storage
Storing Leftovers
Leftover garlic potato balls can be stored in an airtight container in the refrigerator for up to 3 days. This makes it easy to enjoy the snack again without losing much of the original crispiness or flavor.
Freezing
If you want to keep them longer, freeze the uncooked shaped potato balls on a baking sheet lined with parchment paper until solid. Then transfer them to a freezer-safe bag or container. When frozen, they’ll keep well for up to 2 months and are perfect for quick frying whenever the craving hits.
Reheating
To reheat, bake the cooked or frozen potato balls in a preheated oven at 375°F (190°C) until heated through and crisp again. Avoid microwaving as it tends to make them soggy and less appealing.
FAQs
Can I bake the garlic potato balls instead of frying?
Absolutely! Baking is a healthier alternative. Just brush the balls lightly with oil and bake at 400°F (200°C) for about 20-25 minutes, turning halfway through, until golden and crispy.
What type of cheese works best for this recipe?
Cheeses that melt well like mozzarella, cheddar, or a mild gouda are perfect. They create that delicious gooey center that contrasts wonderfully with the crispy outside.
Can I make these gluten-free?
Yes, this recipe is naturally gluten-free if you avoid adding any flour or breadcrumbs. If you want extra binding, substitute with gluten-free alternatives.
How do I avoid the potato balls falling apart during frying?
Ensuring the mashed potatoes are well drained before mixing and not too loose helps. Also, chilling the shaped balls for about 30 minutes before frying helps them hold their shape better.
Can I add other herbs or spices?
Definitely! Fresh herbs like chives, thyme, or dill complement the garlic nicely, and a dash of paprika or cayenne pepper can add a smoky or spicy kick to suit your taste.
Final Thoughts
There’s something truly satisfying about sharing a batch of homemade **Garlic Potato Balls: A Delicious and Easy Recipe to Try Today Recipe** with loved ones. Crispy on the outside, tender and flavorful on the inside, they are a fantastic way to bring a little joy and comfort to your table. I’m excited for you to make this recipe your own and watch it become a beloved favorite in your home!